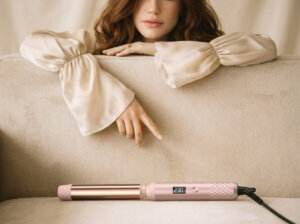
How to Curl Your Hair Step by Step

HAIR TUTORIALS · CURLING

Good curls are less about memorizing one technique and more about controlling a few variables: section size, heat, direction, placement, and what you do after the curl leaves the tool. Once you understand those, you can move from defined curls to loose waves without relearning everything from scratch.

THE CURL FORMULA

Prep → Section → Shape → Cool → Finish

Five stages. Most curling problems can be traced back to one of them.

STEP-BY-STEP CURLING · HERO

BEFORE YOU START

Set Yourself Up for a Better Curl

Start with fully dry, detangled hair. If you use a heat protectant or styling product, follow its directions and make sure the hair is in the condition recommended for your tool before applying heat.

Choose a temperature appropriate for your hair and your tool rather than automatically selecting the highest setting. Fine, fragile, color-treated, or already stressed hair generally calls for a more conservative approach than coarse or resistant hair.

Most importantly: decide what you are trying to create before you start curling. Soft wave? Loose curl? Defined curl? Your answer changes the choices that follow.

STEP 01

Divide the Hair Into Working Sections

Sectioning is not just about keeping hair tidy. It helps you control how much hair meets the heated surface at one time.

Start by dividing the hair into manageable zones—commonly a lower section and an upper section, then smaller working sections within each area. Very thick or dense hair may need more layers.

A useful check

If the section is so thick that some strands barely contact the tool, it is probably too large.

STEP 02

Choose Your Section Size Based on the Finish

Smaller section

More visible curl and stronger definition.

Medium section

A balanced curl that can later be softened.

Larger section

Broader movement and a looser-looking result—provided the tool can heat the section evenly.

Do not think of section size as a fixed rule. Hair density, tool size, and the amount of definition you want all affect what works. The goal is consistency where you want consistency—not making every section mechanically identical.

STEP 03

Decide Where the Curl Should Begin

You do not have to curl from the same height every time.

Higher placement creates more texture through the upper lengths and can make the style feel fuller. Mid-length placement keeps the top calmer while creating obvious movement through the body. Lower placement gives the ends shape while keeping most of the hair relatively smooth.

For many everyday looks, starting somewhere through the mid-lengths creates a useful balance between movement and softness.

STEP 04

Choose the Curl Direction

Direction changes how curls sit next to one another and how the hair frames the face.

Away from the face

Opens the front of the hairstyle and often creates a more lifted, flowing effect.

Toward the face

Creates a more wrapped, face-framing feeling.

Alternating directions

Helps sections separate and can create a more irregular, lived-in texture.

One consistent direction

Can help curls visually merge into a more unified wave pattern after brushing.

MID-TUTORIAL CHECKPOINT

Before you apply heat, you should know four things.

How much hair? · Where does the curl begin? · Which direction? · What finish am I aiming for?

STEP 05

Wrap or Feed the Hair Smoothly

Follow the design and instructions of your curling tool. With a wand, the hair is typically wrapped around the barrel; with a clamp-style iron, the section may be fed and rotated differently; automatic curlers have their own loading requirements.

Whatever the tool, avoid twisting or bunching the section unintentionally unless that texture is part of the look you want. A cleaner, more even section generally produces a more predictable curl.

Keep fingers and skin away from heated surfaces and use any heat-safe accessories supplied with the tool as directed.

STEP 06

Use Heat Deliberately—Not Automatically

There is no single temperature or hold time that is correct for every person, every tool, and every section.

Use the manufacturer’s guidance as your starting point. Select the lowest effective setting that produces the result you need for your hair, and avoid repeatedly reheating the same section simply because the first curl does not look identical to the previous one.

More heat is not the same as a better curl.

Temperature, contact time, section size, and hair characteristics work together. If the result is inconsistent, check the whole technique before simply increasing heat.

STEP 07

Release the Curl and Let It Cool

This is one of the easiest steps to rush.

After releasing the section, allow the curl to cool before aggressively brushing, stretching, or reshaping it. Hair is more likely to keep the intended form when you give the newly created shape time to settle.

If your goal is a loose finish, resist the urge to create an extremely loose curl and immediately pull it apart. It can be more effective to create enough shape first, let it cool, and then soften it.

STEP 08

Finish According to the Look You Want

For defined curls

Separate gently with your fingers and preserve most of the original curl structure.

For loose curls

Open the sections more thoroughly so the curl becomes larger and softer.

For soft waves

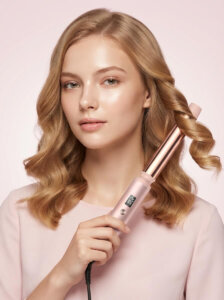
Once fully cooled, loosen or brush the curls enough that individual sections begin to merge into flowing movement.

For an undone finish

Break up uniformity. Let some pieces stay straighter, soften the ends, and avoid making every section match.

If Your Curls Aren't Turning Out Right

Instead of starting over, diagnose the result.

Curl is too tight

Try a larger section, a broader curl shape, lower placement, or more separation after cooling.

Curl is barely visible

Check whether the section is too large, whether the hair is contacting the tool evenly, and whether your settings follow the tool’s guidance for your hair.

Hair looks too 'done'

Leave the ends softer, alternate some directions, and separate the finished curls more.

One side looks different

Check your hand position and direction. Mirroring the motion on the opposite side can feel surprisingly different.

Curls disappear quickly

Make sure the hair was fully dry, avoid disturbing each curl before it cools, and review section size and product choices.

The Four Variables Worth Practicing

01 · Section

How much hair you work with.

02 · Placement

Where the curl begins.

03 · Direction

Where the curl travels.

04 · Finish

How much of the curl you preserve after cooling.

Once those four decisions become familiar, curling becomes much less about copying a sequence and much more about designing the result you want.

Learn the shape, not just the steps.

The best curling technique is the one you understand well enough to adjust.

Continue Reading